
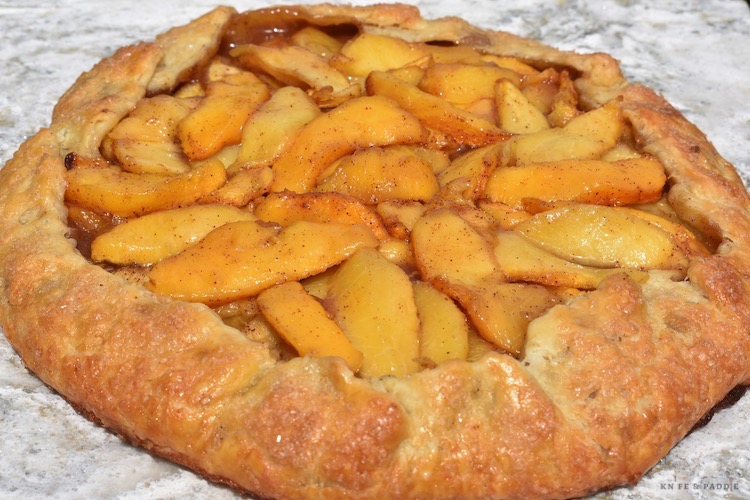
This all butter pie crust has tons of buttery flavor. It’s quick and easy to make and renders that perfect flaky crust! Beginner friendly!
As I have mentioned, there is this pie shop down at the Cape called Marion’s Pie Shop. I LOVE their pies! During my visit while down at the Cape, I stopped by to pick up a pie. I told my husband, I was going to ask them if they used all butter or half butter/half shortening. My husband was skeptical and said that there was no way the kid at the counter would know and he was right. When I asked the girl if they used all butter, she said they only used flour in their crust. As you know, there is flour, but you need fat to bind it all together. However, I am going to cover all my bases here and give you a simple all butter crust to round out my favorite pie crust (combo of shortening and butter) and old fashioned pie crust (all shortening).
I am quickly becoming a pie crust aficionado! In the past few months, I have baked more pies than in the past 16 years of marriage! With some expert tips from my mom, who is a fantastic pie baker, I will navigate you along this road of making pie crust. It’s super simple once you get the hang of it.
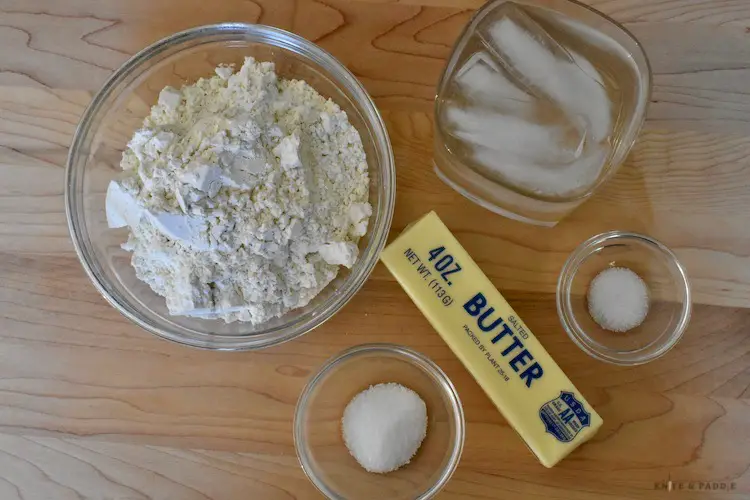
All butter pie crust-Ingredients
Flour, sugar, butter, salt and ice water.
Let’s talk ingredients
- Flour: I use all purpose flour. Flour is the foundation of your pie crust.
- Salt: Salt enhances the flavor of your pie crust. Use table salt because the fine crystals are easier to mix. Although contrary to most bakers, I mostly use salted butter but I adjust the salt down accordingly. The reason most bakers use unsalted butter is because salt content varies according to brand. By using unsalted butter, you have more control over the amount of salt used.
- Sugar: I like to add just a little sweetness to my pie crust. Adding just a little sugar, also helps with browning and enhances the flavor of your pie crust.
- Cold butter: Why? You want little pea sized butter throughout your crust. The cold fats mixed into your crust will melt as you bake it creating little air pockets that give you that flaky, beautiful crust.
- Ice Water: This ingredient is added last to your pie crust. About 1/2 cup of ice water is needed to bring shape to your pie crust. If you feel as though your dough is too dry, add one tablespoon of ice water at a time. Too much water makes the dough too sticky; too little water, makes the dough hard and crumbly. Be careful not to overwork the dough when mixing.
Pie Crust Instructions
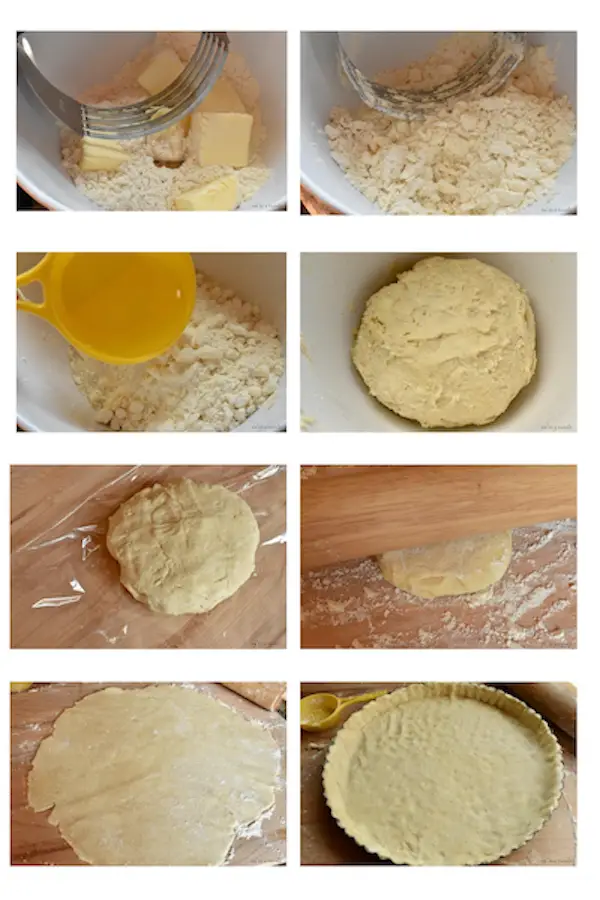
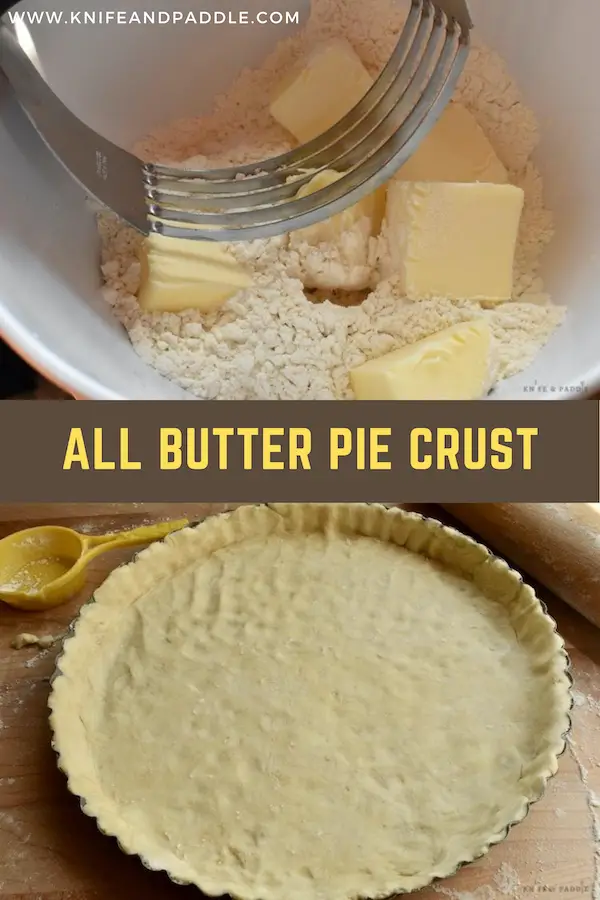
- Mix all the dry ingredients together in a mixing bowl.
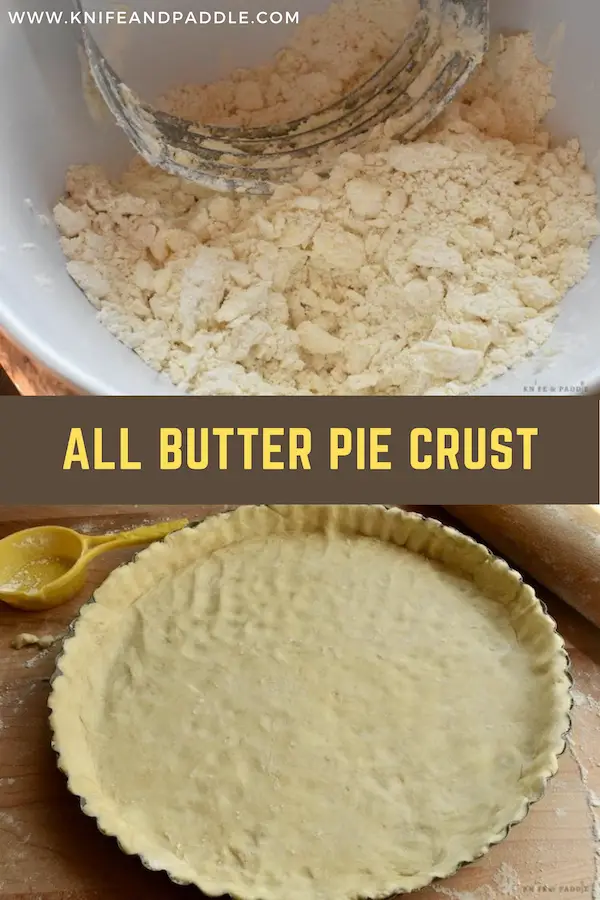
- Cut in the butter with a pastry cutter or food processor.
- Don’t cut the butter in too much. There should be some big chunks of butter among smaller ones. These butter chunks are what make the dough flaky when cooked.
- Add about 1/2 cup ice water a little at a time, working gently with your hands until the dough begins to come together. If the dough is dry, add one tablespoon of ice water in at a time. The dough should feel moist but not wet. Gather it into your hand and squeeze. It should hold together. Don’t over work the dough or your crust will become tough.
- Gather the dough into a ball.
- Flatten into a disc (single-crust) or cut dough ball in half and make two disks (double crust) and wrap in plastic wrap.
- Chill for at least 30 minutes before using. The longer the dough is chilled the better.
- Once chilled, place your disk on a well floured surface. Place some flour in a small bowl. Use the flour to keep your surface, rolling pin and hands floured. This helps to prevent the dough from sticking to the surface and rolling pin.
- When rolling the pie dough, work from the center out. Turn your dough and continue to lightly flour the surface and rolling pin to prevent sticking.
- If making a standard pie (9 inches) roll out dough into a 12-13 inch circle.
- Once the dough has been rolled out, carefully fold the dough into quarters, and gently lift into the pie plate or tart pan.
- If using a tart pan, work the dough into the flutes of the tart pan. Once completed, continue on with your baking directions.
- Single-Crust: fold the edge of the crust under itself and gently squeeze it together. Crimp or flute the edges. Continue on with your baking instructions.
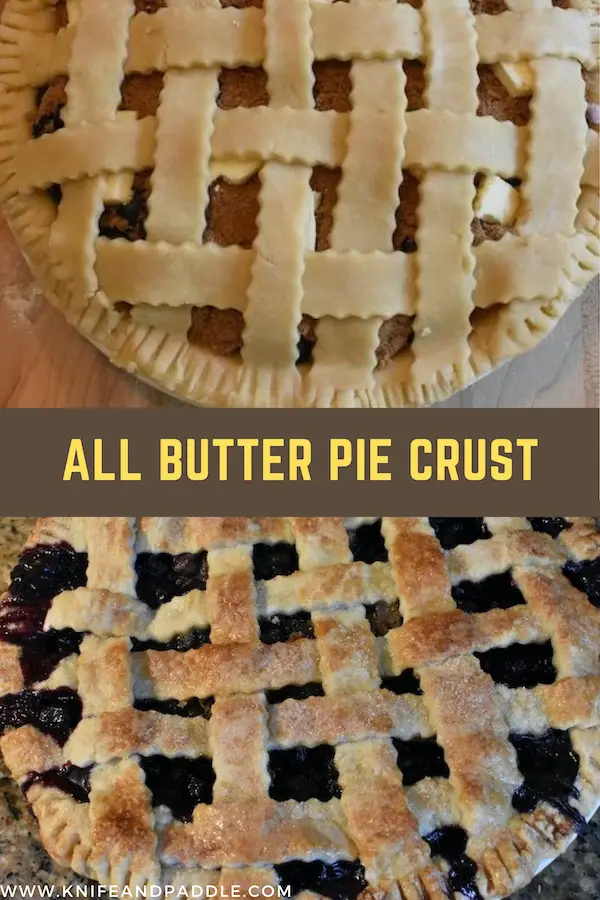
- Double-Crust: trim the edges of the bottom crust leaving about 1/2 inch of dough. Once the filling is added, repeat the process for the top crust and place it over the center of the pie. Tuck the top crust under the edge of the bottom crust, pressing the two together. To crimp the pie edge, use a fork and gently press down working your way around the pie plate. To flute, use your thumb and pointer finger of one hand and the pointer finger on the other hand and press together. Continue your way around the pie plate.
- Refrigerate the pie if the dough becomes warm. This enables the fat to chill, which ultimately gives your pie that flaky crust.
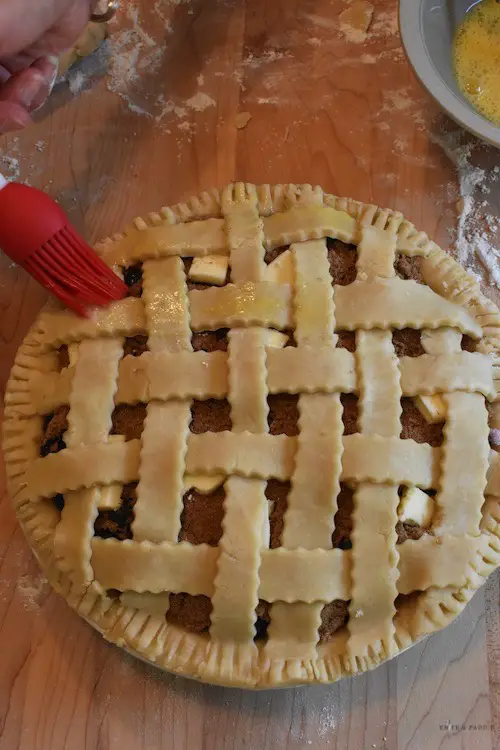
- Optional: Before baking, brush the crust with milk or a lightly beaten egg. Sprinkle coarse sugar over the top of the crust.
- For filled pies, cut about 5 slits in the top crust before baking. This helps the steam to escape when baking.

Blind Baking Your Crust
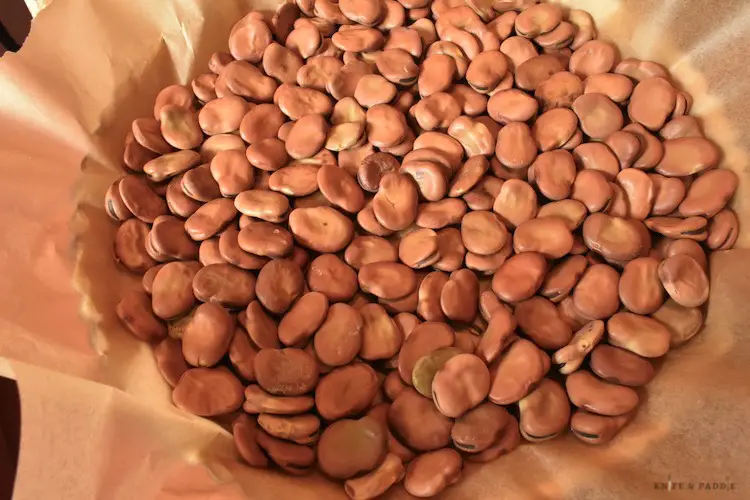
Some recipes call for blind baking. Blind baking is when you bake the pie shell before filling. The reason behind blind baking is that it helps to keep the pie crust from becoming soggy, especially if you are using a wet filling. After the pie shell is placed into your pie plate or tart pan, fill the empty crust with pie weights or dried beans. Make sure to use parchment paper and place it down onto the pie shell before filling. Using weights or dried beans help to keep the pie shell from shrinking and shriveling down.
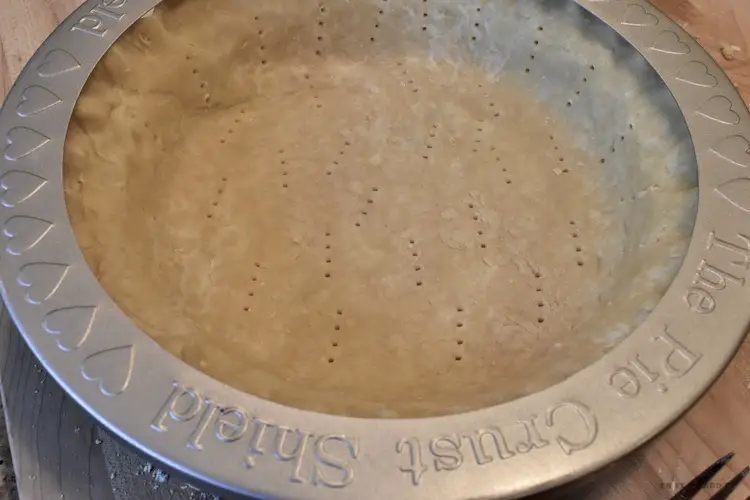
Pie Crust Shields
In addition, you may want to use a pie crust shield. The shield keeps the crust from browning too quickly and/or burning. You can also use pieces of aluminum foil to prevent the crust from burning. Gently place the foil over the crust and lightly press together.
Glass Pie Plates
Lastly, use a glass pie plate for baking your pies. Glass pie plates conduct heat more evenly, allowing the bottom crust to bake thoroughly. It’s also a great way to see first hand when the bottom of the crust is brown, ready and done!
Are you ready? Let’s get started!
Simple All Butter Pie Crust
Ingredients
- 2 1/2 cups flour
- 1 cup butter 2 sticks
- 2 tsp sugar for dessert pies
- 1/2 tsp salt
- 1/2 cup ice water add 1 tbsp at a time if more is needed
Instructions
- Mix all the dry ingredients together in a mixing bowl.
- Cut in the butter with a pastry cutter or food processor. Don't cut the butter in too much. There should be some big chunks of butter among smaller ones. These butter chunks are what make the dough become flaky when cooked.
- Add about 1/2 cup ice water a little at a time working gently with your hands until the dough begins to come together. If the dough is dry, add one tablespoon of ice water in at a time. The dough should feel moist but not wet. Gather into your hand, and squeeze. It should hold together. Don't over work the dough or your crust will become tough.
- Gather the dough into a ball. Flatten into a disc (single-crust) or cut dough ball in half and make two disks (double crust) and wrap in plastic wrap.
- Chill for at least 30 minutes before using. The longer the dough is chilled the better.
- Once chilled, place the disk on a well floured surface. Place some flour in a small bowl. Use the flour to keep your surface, rolling pin and hands floured. This helps to prevent the dough from sticking to the surface and to the rolling pin.
- When rolling the pie dough, work from the center out. Turn the dough and continue to lightly flour the surface and rolling pin to prevent sticking.
- If making a standard pie (9 inches) roll out dough into a 12-13 inch circle. Once the dough has been rolled out, carefully fold the dough into quarters, and gently lift into the pie plate or tart pan.
- If using a tart pan, work the dough into the flutes of the tart pan. Once completed, continue on with your baking directions.
- Single-Crust: fold the edge of the crust under itself and gently squeeze it together. Crimp or flute the edges. Continue on with your baking instructions.
- Double-Crust: trim the edges of the bottom crust leaving about 1/2 inch of dough. Once the filling is added, repeat the process for the top crust and place it over the center of the pie. Tuck the top crust under the edge of the bottom crust, pressing the two together.
- To crimp the pie edge, use a fork and gently press down working your way around the pie plate. To flute, use your thumb and pointer finger of one hand and the pointer finger on the other hand and press together. Continue your way around the pie plate.
- Refrigerate the pie if the dough becomes warm. This enables the fat to chill, which ultimately gives your pie that flakey crust.
- Optional: before baking brush the crust with milk or a lightly beaten egg. Sprinkle coarse sugar over the top of the crust.
- For filled pies, cut about 5 slits in the top crust before baking. This helps the steam to escape when baking. Continue on with your baking instructions.


Recent Comments