Homemade Peppermint Bark is easy to make and delicious! Made with semi-sweet and white chocolate topped off with crushed candy canes.

‘Tis the season of joy, and what better way to spread holiday cheer then with a delectable treat that combines the rich goodness of chocolate with the refreshing burst of peppermint. My kids love peppermint bark but buying it at the store can be so costly! Today, we’ll show you how easy this recipe is to make yourself for a fraction of the cost. So mix up a batch, add it to your holiday cookie platter and see how quickly it disappears!
Why You’ll Love This Homemade Peppermint Bark
- Easy to make!
- Great for the holidays!
- Just 5 ingredients!
- A combination of semi-sweet and white chocolate!
- Fresh peppermint taste!
- Wrap it up for a homemade gift!
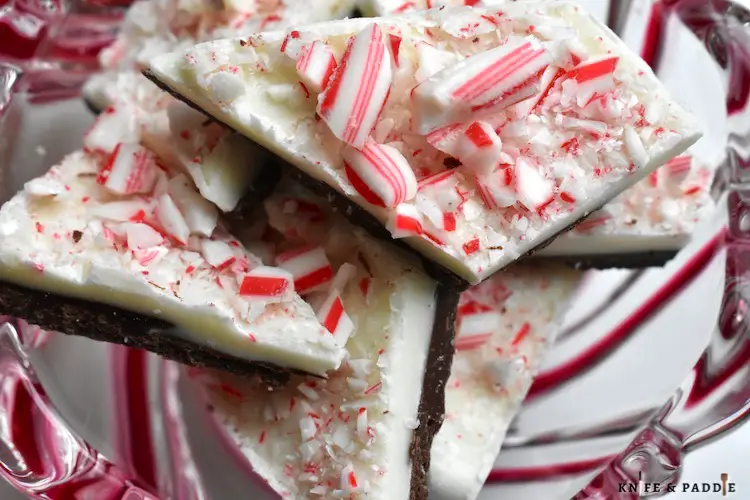
Homemade Peppermint Bark-Ingredients
- 12 oz package of semi-sweet chocolate chips
- 12 oz package of white chocolate chips
- 1-2 tsp vegetable shortening
- 1 1/2 tsp peppermint extract
- 5-6 candy canes crushed
Instructions
- Line the bottom of the baking pan with parchment paper.
- In a small saucepan, over medium heat, melt the semi-sweet chocolate until smooth, stirring frequently. If using a microwave, microwave at 20-30 second intervals, stirring in between. If chocolate is too thick, add 1-2 tsp of vegetable shortening to thin it out.
- Pour melted chocolate onto the prepared baking pan, spreading it evenly. Place the pan in the freezer for 10 minutes.
- Repeat the melting process with the white chocolate chips. Add peppermint extract and if chocolate is too thick, add 1-2 tsp of vegetable shortening to thin out the chocoalte.
- Pour melted white chocolate onto the semi-sweet chocolate layer, spreading it evenly.
- Sprinkle crushed candy canes generously over the white chocolate layer. Gently press down to make sure they adhere to the chocolate.
- Place in the refrigerator to chill for about 30 minutes or place in the freezer for 15 minutes to speed up the process.
- Once candy is set, remove parchment paper and break or cut into pieces.
- Serve and enjoy!
- Place in an airtight tin for up to 3 days at room temperature or place in the refrigerator for up to 3 weeks.
Tips for Making the Best Peppermint Bark
- Melting the chocolate: Achieving the perfect melt is crucial for a smooth and velvety peppermint bark. Whether you choose the traditional double boiler method or the convenience of heating it over the stove or in a microwave, be attentive to prevent overheating. Stir the chocolate at intervals for even melting, and stop as soon as it reaches a silky consistency. If chocolate is too thick add 1-2 tsp of vegetable shortening to thin it out.
- Spreading the chocolate layers: Spread the chocolate layers evenly to achieve a consistent bark. Use a spoon or offset spatula to spread the chocolate layers.
- Adding the Peppermint Flavor: When adding the peppermint extract start off with a small amount and taste-test before adding more. I like a nice, subtle yet distinct peppermint flavor that doesn’t overpower the chocolate. Feel free to experiment to suit your personal taste preferences.
- Crushing candy canes: I find the easiest way to crush candy canes is to put them in a ziploc plastic bag and gently crush with a rolling pin, cookie scoop or mallet. I like larger pieces, so crush until you get the consistency you like. Use as many as you would like and spread over the top.
Storing the Peppermint Bark
Store this homemade peppermint bark in an airtight tin for up to 3 days at room temperature, or place in the refrigerator, for up to 3 weeks.
Serving and Presentation
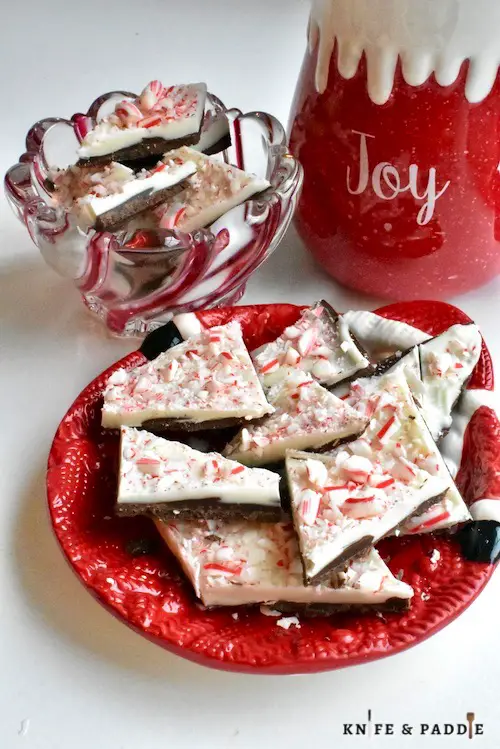
Once your peppermint bark has chilled and set, it’s time to share and enjoy. Cut it into squares for a classic presentation or break it into rustic shards for a more casual approach. Package them in festive boxes, tins or treat bags and give them as holiday gifts. In addition, simply arrange them on a platter or add them to a cookie platter for a delightful holiday treat.

Grab your ingredients, it’s your turn!
Crafting this Homemade Peppermint Bark is not only a delightful experience but also a testament to the joy of the holiday season. Embrace the simplicity of this recipe, and feel free to get creative with your presentation. Share your creations with friends and family, and let the holiday festivities begin! For more holiday recipes and inspiration, explore our blog and make this season a truly delicious one. Merry Christmas and Happy Holidays! And remember…
Life’s too short to eat bad food!
For other delicious candy treats try:
No Bake Chocolate Peppermint Cookies

Homemade Peppermint Bark
Equipment
- 9×13 inch baking pan
- small sauce pan(s) or microwavable bowl(s)
- Parchment paper
Ingredients
- 12 oz package of semi-sweet chocolate chips
- 12 oz package of white chocolate chips
- 1-2 tsp vegetable shortening
- 1 1/2 tsp peppermint extract
- 5-6 candy canes crushed
Instructions
- Line the bottom of the baking pan with parchment paper.
- In a small saucepan, over medium heat, melt the semi-sweet chocolate until smooth, stirring frequently. If using a microwave, microwave at 20-30 second intervals, stirring in between. If chocolate is too thick, add 1-2 tsp of vegetable shortening to thin it out.
- Pour melted chocolate onto the prepared baking pan, spreading it evenly. Place the pan in the freezer for 10 minutes.
- Repeat the melting process with the white chocolate chips. Add peppermint extract and if chocolate is too thick, add 1-2 tsp of vegetable shortening to thin out the chocoalte.
- Pour melted white chocolate onto the semi-sweet chocolate layer, spreading it evenly.
- Sprinkle crushed candy canes generously over the white chocolate layer. Gently press down to make sure they adhere to the chocolate.
- Place in the refrigerator to chill for about 30 minutes or place in the freezer for 15 minutes to speed up the process.
- Once candy is set, remove parchment paper and break or cut into pieces.
- Serve and enjoy!
- Place in airtight tin for up to 3 days at room temperature or place in the refrigerator for up to 3 weeks.








Recent Comments